


Cleaning Up After Home Projects: Post-DIY Renovation Tips
Congratulations on completing your DIY home renovation project! As you stand in awe of your newly transformed space, it’s time to shift your focus to the post-renovation cleanup. While the thought of cleaning up after the dust and debris may seem daunting, fear not! With the right approach and the following expert tips, you’ll have your space looking spick and span in no time.
Gathering the Essential Cleaning Supplies
Before embarking on the post-renovation cleanup journey, it’s imperative to assemble a comprehensive arsenal of cleaning supplies. Equipping yourself with the right tools ensures that you can effectively tackle the remnants of your DIY home improvement project. Here’s a detailed list of the essential cleaning supplies you’ll need:
- Brooms and Dustpans: Begin with the basics. A sturdy broom and dustpan are your first line of defense against larger debris and loose dirt. Sweep the area thoroughly before delving into deeper cleaning.
- Mops and Buckets: Different surfaces require different cleaning methods. Make sure you have a mop and a set of buckets for both wet and dry cleaning. Microfiber mop heads are highly effective at capturing dust and grime.
- Vacuum Cleaner: A reliable vacuum cleaner, equipped with suitable attachments, is indispensable for extracting dust from nooks, crannies, and carpets. Opt for a model with HEPA filters to maintain indoor air quality.
- Dust Masks and Safety Glasses: Renovation projects often stir up airborne particles that can be harmful when inhaled. Protect yourself with dust masks and safety glasses to ensure your health and safety throughout the cleanup process.
- Rubber Gloves: Cleaning agents and chemicals can be harsh on your skin. Rubber gloves shield your hands from potential irritation while handling cleaning solutions and surfaces.
- All-Purpose Cleaner: A versatile all-purpose cleaner is your go-to solution for wiping down surfaces, fixtures, and appliances. Look for one that’s effective yet gentle on various materials.
- Microfiber Cloths and Sponges: Stock up on high-quality microfiber cloths and sponges. These tools are adept at capturing dirt and grime without leaving behind lint or streaks.
- Scrub Brushes: Stubborn stains and grout require a little extra elbow grease. Invest in a variety of scrub brushes with different bristle strengths to tackle different surfaces effectively.
- Cleaning Solutions: Depending on the nature of your renovation, you might need specialized cleaning solutions. These could include window cleaner, tile and grout cleaner, stainless steel cleaner, and more.
- Trash Bags: As you clean, you’ll generate a fair amount of waste. Have an ample supply of sturdy trash bags on hand to dispose of debris and non-recyclable items responsibly.
- Labels and Markers: If you’re sorting and organizing leftover materials, labels and markers come in handy for proper identification. This step ensures you can easily find items when needed.
- Extension Cords: Ensure you have sufficient extension cords for your vacuum cleaner and other cleaning equipment. This prevents unnecessary disruptions due to limited reach.
- Step Ladder: Accessing high areas, such as shelves or ceiling corners, might require a step ladder. Safety first – choose a stable ladder with slip-resistant features.
- Duster or Swiffer: Dust tends to settle everywhere. A duster or a Swiffer-type tool is excellent for quickly capturing dust on surfaces, making regular maintenance easier.
- Trash Can and Recycling Bins: Separate waste from recyclables by placing dedicated trash cans and recycling bins in convenient locations. This practice promotes eco-friendly disposal.
Armed with these essential cleaning supplies, you’re well-prepared to tackle the post-renovation cleanup process effectively. By investing a little time and effort into gathering the right tools, you’re setting the stage for a successful and thorough cleanup operation.
Clearing Out Debris and Dust
As you stand amidst the remnants of your successful DIY renovation project, the first step towards restoring order is to clear out debris and banish dust that has settled like a silent veil over surfaces. This foundational phase of the post-renovation cleanup is crucial for creating a clean canvas on which to work your cleaning magic. Here’s a detailed breakdown of how to go about it:
Removing Larger Debris: Begin by tackling the more noticeable debris that has accumulated during your project. Carefully pick up and discard larger pieces of wood, drywall, or any other materials that are no longer needed. This step not only improves the aesthetics of the space but also sets the stage for more detailed cleaning.
Dusting Surfaces: Armed with a high-quality dust cloth or duster, work your way through surfaces that are easily accessible. Dust accumulates on various surfaces, including countertops, shelves, and furniture. Make sure to pay attention to the tops of furniture and items on display, where dust often goes unnoticed.
Vacuuming with Precision: It’s time to bring out the vacuum cleaner armed with the appropriate attachments. Begin by vacuuming the entire area to capture loose dirt and dust particles. Use a soft brush attachment for delicate surfaces and a crevice tool for edges and corners that are harder to reach.
Targeting Hard-to-Reach Areas: For those pesky areas that your regular vacuum attachments can’t quite reach, enlist the help of a shop vac. Its superior suction power and flexible attachments allow you to delve into crevices, corners, and gaps where dust and debris tend to accumulate.
Addressing Ventilation and Ducts: Dust and debris often find their way into ventilation systems and ducts. If you suspect your HVAC system has been affected, it’s wise to clean or replace filters and consider scheduling a professional duct cleaning to ensure the air quality in your space remains optimal.
This initial phase of clearing out debris and dust lays the groundwork for a more thorough and effective cleaning process. By systematically addressing larger debris, dusting surfaces, and harnessing the power of your vacuum cleaner, you’re setting the stage for the subsequent cleaning steps to achieve their maximum impact. Remember, a solid start in the cleanup process ensures that every subsequent task yields better results and leaves your space gleaming with cleanliness.
Tackling Surfaces and Fixtures
As the remnants of your DIY renovation project gradually disappear, it’s time to focus your attention on restoring the shine and allure of surfaces and fixtures that may have been overlooked amidst the excitement. This phase of the post-renovation cleanup involves a meticulous approach to wiping down, disinfecting, and rejuvenating various elements in your revamped space. Here’s a step-by-step guide to help you tackle surfaces and fixtures with finesse:
- Gathering Your Supplies: Before you begin, ensure you have a damp microfiber cloth and an all-purpose cleaner at the ready. Microfiber cloths are excellent for capturing dust and grime without leaving streaks behind, while an all-purpose cleaner simplifies the process by effectively eliminating a wide range of contaminants.
- A Comprehensive Wipe-Down: Start by methodically wiping down surfaces such as countertops, shelves, and tables. Begin from the top and work your way down to avoid dust resettling on cleaned areas. This preliminary step helps remove surface-level dirt, dust, and debris.
- Attending to Fixtures: Fixtures play a pivotal role in the aesthetics and functionality of your space. Gently wipe light switches, doorknobs, cabinet handles, and any other fixtures that might have been handled during the renovation. This not only restores their appearance but also helps maintain hygiene.
- Focusing on High-Touch Areas: Pay special attention to high-touch areas, which tend to accumulate germs and dirt. Light switches, doorknobs, and remote controls are common culprits. A thorough wipe-down with a disinfectant solution helps eliminate potential sources of contamination.
- Mirrors and Glass Surfaces: If your renovation involved painting or construction work, mirrors and glass surfaces might be marred with splatters and smudges. Use a glass cleaner to restore their clarity and ensure a streak-free finish.
- Leather and Upholstery: If your space includes leather furniture or upholstered pieces, give them a gentle wipe-down to remove dust and debris. Consider using a specialized cleaner that’s safe for the material to prolong their life and appearance.
- Appliances and Electronics: Dust and dirt can accumulate on appliances and electronics, affecting their performance and appearance. Wipe down the surfaces of your appliances and electronic devices with a slightly damp cloth to remove any residue.
- Regular Maintenance Tips: After the thorough cleaning, consider incorporating regular maintenance practices. Use coasters to protect surfaces from water rings, and encourage family members and guests to wipe their feet before entering to minimize dirt tracked in from outside.
Addressing Paint and Finishing Residues
If your project involved painting or staining, there might be residual paint and finishes on surfaces. Gently remove these with appropriate cleaning agents to reveal the true beauty of your renovation.
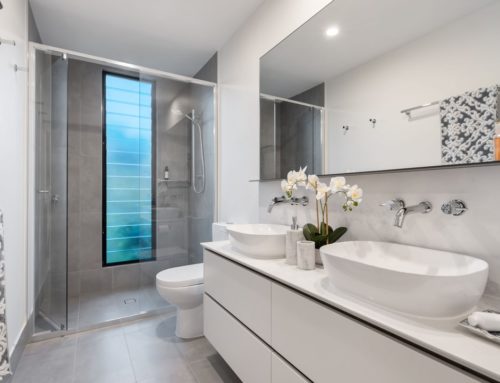
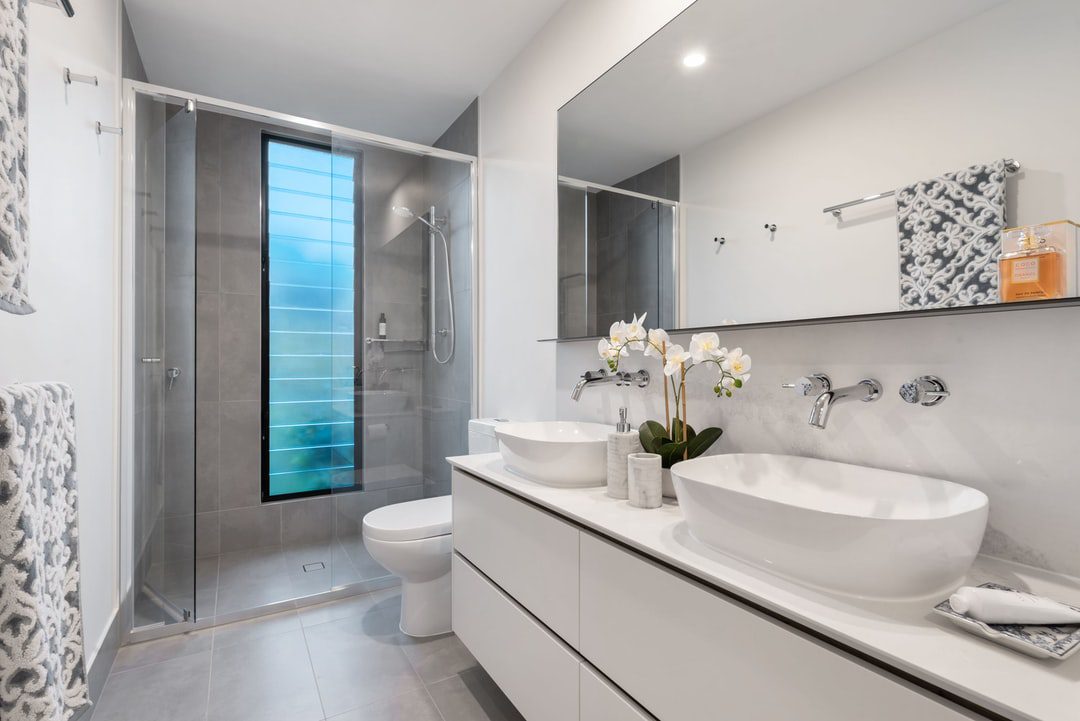
Flooring TLC: Carpets, Tiles, and Hardwood
The floors of your newly transformed space are a testament to your DIY prowess, but they can also bear the brunt of renovation residue. Whether your feet tread on luxurious carpets, sleek tiles, or elegant hardwood, each flooring type demands distinct care to maintain its allure. In this phase of the post-renovation cleanup, we’ll walk you through tailored techniques to ensure that your floors regain their pristine glory:
Caring for Carpets: Carpets exude warmth and comfort, but they are magnets for dust and debris. Begin by giving your carpets a thorough vacuuming using a vacuum cleaner equipped with a brush attachment. This helps dislodge dirt and dust trapped within the fibers. For any stains or spots, use a carpet cleaner appropriate for your carpet material. Gently blot the stains using a clean cloth, avoiding excessive moisture that could damage the carpet’s backing. Regular vacuuming and prompt attention to spills are key to maintaining the vibrancy of your carpets.
Tending to Tiles: Tiles can regain their luster with a combination of sweeping and mopping. Start by sweeping or vacuuming to remove loose dirt and debris. Next, mop the tiles using a mild detergent mixed with warm water. Avoid harsh chemicals that might harm the grout or tiles themselves. For stubborn grout stains, consider using a mixture of baking soda and water. Allow the mixture to sit for a few minutes before scrubbing gently with a brush. Rinse thoroughly to reveal clean, sparkling tiles.
Nurturing Hardwood Floors: Hardwood floors radiate timeless elegance, but they require special attention to preserve their charm. Begin by sweeping or using a microfiber mop to remove dust and dirt. Avoid using excessive water, as hardwood is sensitive to moisture. If necessary, use a damp mop with a specially formulated hardwood floor cleaner. Be sure to follow the manufacturer’s recommendations. Regularly check for scratches and consider using rugs or mats in high-traffic areas to prevent wear. Periodically applying a hardwood floor polish can help maintain the floor’s natural shine.
Safety Considerations: Regardless of the flooring type, ensure your safety during the cleaning process. Place “wet floor” signs if you’ve used water on your tiles or hardwood. For carpets, ensure that they are completely dry to prevent slips. Use caution when moving furniture back into place to avoid scratching or damaging the floors.
Routine Maintenance: In addition to post-renovation cleaning, establish a routine maintenance schedule for your floors. Regular vacuuming, sweeping, and immediate attention to spills can prevent dirt and stains from becoming ingrained. Using rugs or doormats at entryways can help minimize the amount of debris brought indoors.
A Closer Look at Windows and Glass
As the finishing touches are being put in place after your DIY renovation project, one often overlooked aspect is the state of your windows and glass surfaces. These transparent portals to the outside world not only offer views but also usher in precious natural light. Unfortunately, they tend to be magnets for construction dust, paint splatters, and fingerprints. In this phase of the post-renovation cleanup, we’ll delve into effective methods to restore your windows and glass surfaces to their crystal-clear brilliance:
Preliminary Dusting: Before you begin cleaning the glass surfaces, start by removing dust and loose dirt from the window frames, sills, and tracks. Use a soft brush or a vacuum cleaner with a brush attachment to capture the debris. This prevents dirt from spreading onto the glass during the cleaning process.
Choosing the Right Cleaner: Selecting the appropriate cleaner is pivotal to achieving streak-free, sparkling glass. Opt for a commercial glass cleaner or create your own solution by mixing equal parts water and white vinegar. Avoid using ammonia-based cleaners on windows with tinted film, as they can damage the tint.
Spray and Wipe Technique: Spray your chosen cleaner onto the glass surface. For large windows, work in sections to prevent the cleaner from drying before you have a chance to wipe it off. Use a lint-free microfiber cloth or a newspaper (yes, they work wonders!) to wipe the glass in a horizontal or vertical motion. This minimizes streaks and ensures even coverage.
Handling Stubborn Stains: If your windows have stubborn stains, like paint splatters, use a razor blade or a glass scraper at a 45-degree angle to gently remove the residue. Be cautious not to scratch the glass surface. Afterward, proceed with the regular cleaning process to ensure a clear finish.
Dealing with Exterior Windows: Exterior windows might require extra attention, especially if they’ve been exposed to the elements during the renovation. Use a hose to gently rinse off loose dirt and debris. Follow up with the same cleaning technique outlined above to bring back their transparency.
Tackling Window Tracks and Sills: Don’t forget to clean the tracks and sills. These areas can accumulate a surprising amount of dirt. Use a toothbrush or a small scrub brush dipped in your cleaning solution to dislodge dirt and grime. Wipe clean with a damp cloth and dry thoroughly.
Finishing Touches: After cleaning the glass, inspect it from different angles to ensure there are no streaks or missed spots. If you notice any streaks, buff them out using a dry, lint-free cloth.
Regular Maintenance: Maintain the clarity of your windows by incorporating regular cleaning into your routine. Consider cleaning them at least twice a year, or more often if your environment is particularly dusty or prone to splatters.
The Final Touches: Polishing and Arrangement
With the major cleaning done, it’s time for the finishing touches. Polish surfaces, arrange furniture, and infuse your personal touch to bring out the best in your revamped space.
Donating or Disposing of Leftover Materials
Dispose of leftover construction materials responsibly. Learn about recycling options and consider donating usable items to reduce waste and benefit others.
Post-Cleaning Safety Checks
With the dust settled and the cleanup complete, it’s time to shift your focus to a critical aspect of your post-renovation journey: ensuring the safety and security of your newly transformed space. Amidst the excitement of the renovation’s success, it’s possible that certain safety considerations may have been overlooked during the cleaning process. By conducting thorough safety checks, you’re not only safeguarding yourself and your loved ones but also ensuring the longevity of your home improvements. Here’s a comprehensive safety checklist to follow:
- Inspect for Loose Fasteners: Take a closer look at surfaces, fixtures, and furniture that may have been touched or moved during the renovation. Check for any loose screws, nails, or fasteners that could pose a tripping hazard or cause instability.
- Examine Flooring and Carpets: Walk through your space and carefully inspect the flooring, including carpets, tiles, and hardwood. Look for any uneven spots or loose sections that might lead to trips or falls.
- Verify Handrail Stability: If your renovation involved staircases or elevated areas, ensure that handrails are securely fastened. Give them a gentle tug to check for stability. Handrails are essential for preventing accidents, especially in areas with height differences.
- Assess Electrical Outlets and Wiring: Carefully inspect electrical outlets, switches, and wiring to ensure they’re not damaged or exposed. Verify that all outlets and switches are functioning properly and have suitable covers.
- Check for Sharp Edges and Protrusions: Run your hands along surfaces, countertops, and edges to identify any sharp corners, protruding objects, or splinters that could lead to injuries, especially for young children.
- Examine Appliances and Fixtures: Test all appliances and fixtures, such as faucets, sinks, and lighting fixtures. Verify that they’re in proper working condition and that they’re securely attached.
- Secure Furniture and Decor: Ensure that heavy furniture and decor items are properly anchored or secured to prevent them from tipping over. This is especially important if you have curious pets or young children at home.
- Inspect Windows and Doors: Check that windows and doors open and close smoothly. Make sure that locks, handles, and latches are in working order. This not only ensures safety but also contributes to your space’s energy efficiency.
- Evaluate Outdoor Spaces: If your renovation extended to outdoor areas, inspect pathways, stairs, and any structures for stability and potential hazards. Verify that handrails and outdoor lighting are functioning properly.
- Address Indoor Air Quality: As a final safety measure, focus on indoor air quality. Ensure that your ventilation systems, such as HVAC filters and air purifiers, are clean and functioning effectively to provide fresh, clean air.
- Test Smoke and Carbon Monoxide Detectors: Double-check that smoke detectors and carbon monoxide detectors are operational. Replace batteries if needed and confirm that alarms sound when tested.
- Emergency Escape Routes: Ensure that emergency escape routes are clear and accessible. Make sure everyone in your household is familiar with these routes.
- First Aid and Emergency Kits: Keep first aid supplies and emergency kits easily accessible. Stock them with essentials like bandages, antiseptics, flashlights, and other necessary items.
When to Seek Professional Help
Not all post-renovation cleaning tasks are DIY-friendly. Understand when it’s best to enlist the help of professional cleaners to tackle complex cleaning challenges.
Budget-Friendly Cleaning Tips
The completion of a DIY renovation project is undoubtedly satisfying, but the aftermath of dust and debris can be a daunting task to address. The good news is that post-renovation cleaning doesn’t have to be a financial burden. With some strategic planning and resourcefulness, you can achieve impeccable results without straining your budget. In this section, we’ll guide you through a collection of budget-friendly cleaning tips that promise exceptional outcomes while keeping your wallet intact:
- Homemade Cleaning Solutions: Harness the power of basic household items to create effective cleaning solutions. Baking soda, vinegar, lemon juice, and dish soap can be mixed in various combinations to tackle different cleaning challenges, from scrubbing surfaces to removing stains.
- Microfiber Magic: Invest in microfiber cloths, which are not only cost-effective but also highly efficient in capturing dust and grime. These reusable cloths require minimal cleaning solutions, helping you save on cleaning products.
- DIY Carpet Freshener: Instead of purchasing commercial carpet fresheners, make your own by mixing baking soda with a few drops of essential oil. Sprinkle the mixture on carpets, let it sit for a while, and then vacuum it up for fresh-smelling carpets.
- Repurpose Old T-Shirts and Towels: Before discarding old t-shirts and towels, consider repurposing them into cleaning rags. These makeshift cleaning tools work just as well as store-bought cloths.
- Multi-Purpose Cleaner: Opt for a multi-purpose cleaner that can be used on various surfaces, minimizing the need for multiple specialized products.
- Reusable Spray Bottles: Invest in a few high-quality, reusable spray bottles. Once you’ve used up a commercial cleaning product, clean the bottle thoroughly and refill it with your homemade cleaning solutions.
- Steam Cleaning: If you have access to a steam cleaner, it can be a budget-friendly investment for deep cleaning carpets and upholstery. Steam effectively removes dirt and kills germs without the need for additional cleaning products.
- Vinegar for Glass Cleaning: Mix equal parts water and white vinegar in a spray bottle for an economical and effective glass cleaner. The acetic acid in vinegar cuts through grime and leaves glass surfaces sparkling.
- Clever Organization: Keep your cleaning supplies organized so that you can easily access what you need. This prevents overbuying products you already have.
- Prevention and Regular Maintenance: The best way to save on cleaning is to prevent excessive mess in the first place. Use rugs and mats to capture dirt at entryways, and establish a regular cleaning routine to avoid the accumulation of dust and grime.
- DIY Air Fresheners: Skip commercial air fresheners and create your own by placing bowls of baking soda infused with essential oils around your space. This absorbs odors without resorting to costly products.
In Conclusion…
Completing a DIY renovation project is undeniably gratifying, but the cleanup process is equally vital. By following these comprehensive post-renovation cleaning tips, you can ensure that your hard work truly shines. Embrace the task with enthusiasm, and revel in the beauty of your newly revamped space, all while basking in the satisfaction of a job well done.
Share this article
Related Posts


Follow us
A quick overview of the topics covered in this article.
- Gathering the Essential Cleaning Supplies
- Clearing Out Debris and Dust
- Tackling Surfaces and Fixtures
- Addressing Paint and Finishing Residues
- Flooring TLC: Carpets, Tiles, and Hardwood
- A Closer Look at Windows and Glass
- The Final Touches: Polishing and Arrangement
- Donating or Disposing of Leftover Materials
- Post-Cleaning Safety Checks
- When to Seek Professional Help
- Budget-Friendly Cleaning Tips
- In Conclusion…


